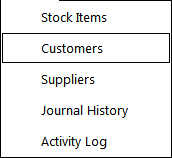
The Customer Enquiry menu allows you to perform some additional functions with Customers.
You have the ability to print Customer Address Labels, Export Customer Details and perform a Mail Merge.
To access the Customer Enquiry screen, go to Enquiry > Customers.
Idealpos will recognise apostrophes in Customer names, such as O’Doyle and McDonald and can be used in Customer Search fields.

A screen will open that allows you to select a range of Customers based on the preferences you require.
It will also display the details of the highlighted customer, and allow you to make some advanced selections to the range that has been selected.
This area of the screen will allow you to select and refine the parameters that you will use to narrow down a range of, or a specific, Customer within the database.
This section is used to filter the Customers based on information that is contained in the database against that Customer.
It will include details that don’t usually change and will be able to be used for contact purposes.
You can select from a specified Date Range, Department, Stock Item, Sales Total and Points Earned.
It is possible to search for customers who have not spent anything by entering ‘0’ in the Total fields.
You can then market to these customers as to why they have not been in store.
Both the Customer Type and the Department fields are able to have a range entered to better filter the results.
Enter the ranges you require. E.g. 1-3, 4, 8-12.
The Customers selected by the search parameters will be displayed in a list on the right-hand side of the window.
These are all the Customers that match any of the selections that have been made in the Search area.
The Customer that has been highlighted in the list will be displayed on the right-hand side of the screen.
The highlighted Customer is able to Modify, view their Account details or display the Journal History.
There are additional functions that can be used that will enable you to use the selected Customer details in a facility out-side of the Idealpos program.
These are Export, Labels, Email and Mobile to Clipboard.
This button allows you to export the selections that you have made to your Customer database, and export them to an .mdb or .txt file.
All details that are linked to the Customer will be exported, but sales history is not included. Additional details regarding Customer Export can be found here.
This button will open the Customer Labels menu and will allow you to print the selected Customers to a label that you have previously designed using third-party software.
Once in the label screen, you are able to adjust the selections of the Customers that you have selected.
Use the drop down menu to select from either Email or Mobile.
Once you select this button, the selected Customers details will be copied to the clipboard, where they can be pasted into the relevant area that you intend to use.
This can be used as a mail merge to send bulk emails to your Customers, or if you are using an SMS service, you may be able to paste the mobile numbers into an import screen.
If you want to create a specific filter in Customer Enquiries, you can apply the filter and save a shortcut as using that filter for use in the future.
Enter a unique name for the filter and save to Functions.
This allows you to set multiple filters on the Customers to be set as shortcuts.
The Customer Enquiry Shortcut will be created on the Dashboard.
The shortcuts will be added to the dashboard in the order that they are created.
Select the shortcut to instantly display the Customer Enquiry screen with the selected filter.